Facebook Twitter Instagram
    The SocioBlend BlogThe SocioBlend Blog
    • Social Media
    • Technology
    • Business
    • SEO
    • Content Marketing
    The SocioBlend BlogThe SocioBlend Blog
    Home»Social Media»How to Upload Your Music on Audiomack (Simple Steps)
    Social Media

    How to Upload Your Music on Audiomack (Simple Steps)

    Mohit MaheshwariBy Mohit MaheshwariJuly 20, 2020Updated:October 24, 2023No Comments3 Mins Read
    How to Upload Your Music on Audiomack (Simple Steps)
    How to Upload Your Music on Audiomack (Simple Steps)
    Share
    Facebook Twitter LinkedIn Pinterest Tumblr WhatsApp

    Audiomack is a fast growing music streaming platform with it’s top users from the United States, China, Nigeria, United Kingdom and Ghana and many other countries. 

    Artists and normal users can upload their music for free and there is no charge for offline music playback. This makes Audiomack a hot music streaming and podcast platform for not just professional artists but also for new users.

    We have read, the first step is always the most difficult one, not in this case at least. Because uploading music on Audiomack is very simple and for those who find it difficult we are here going to show you a step by step process for uploading your music and also how you can delete a song/track on Audiomack.

    We are assuming that you have signed up on Audiomack. After you log in to your Audiomack profile, follow the below mentioned steps.

    Start uploading your music on Audiomack

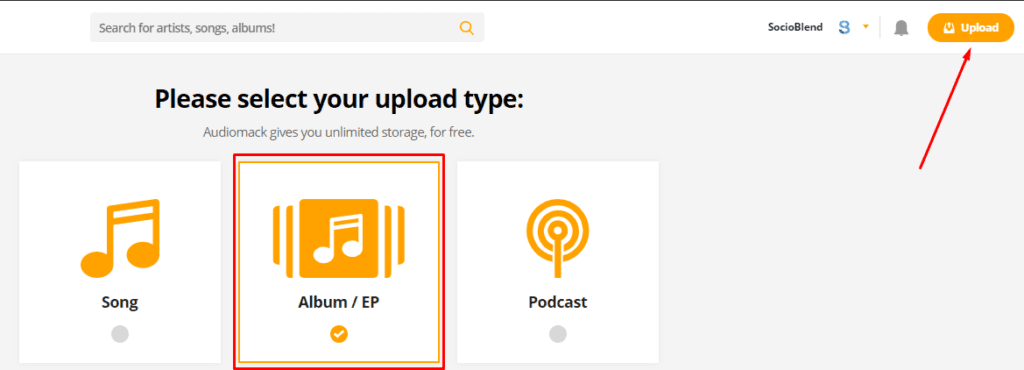
    1. Click ‘Upload‘ on the top right corner and select ‘Album‘ from the 3 options shown if it’s a song of an album. If it’s a single track without any album name, you can choose ‘Single’ or ‘Podcast‘ if you are uploading a podcast. (check the image below)

    upload type on audiomack 1

    (See also: Buy Audiomack Plays from Socioblend)

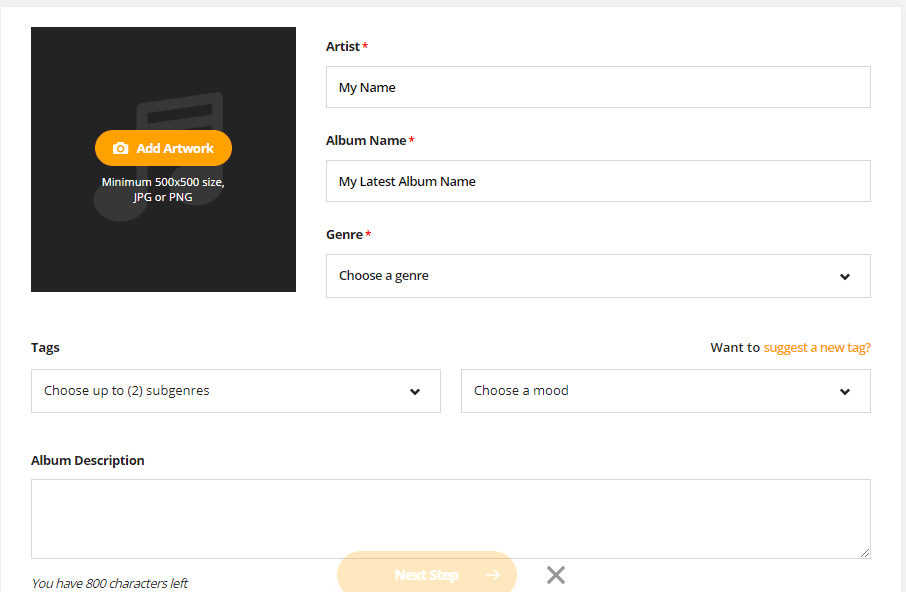
    2. Here you need to fill the details. Enter the name of the Artist, Album, Genre. Write tags, select mood, write few sentences about the song and an image for the album cover with minimum resolution of 500×500 pixels. (check the image below)

    album details to enter on Audiomack
    Enter song details

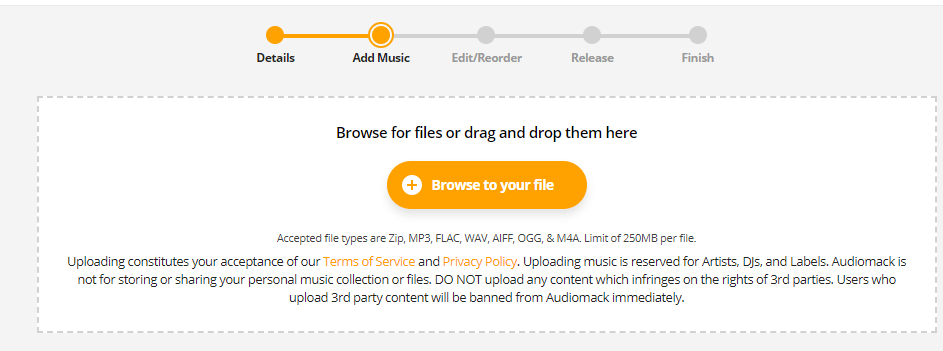
    3. This is an important step. Choose your track file and upload.

    select file and upload on audiomack
    Upload your music file

    4. In this step, you can add the name of the producer or featuring artist’s name. It’s completely optional.

    Edit album step 3

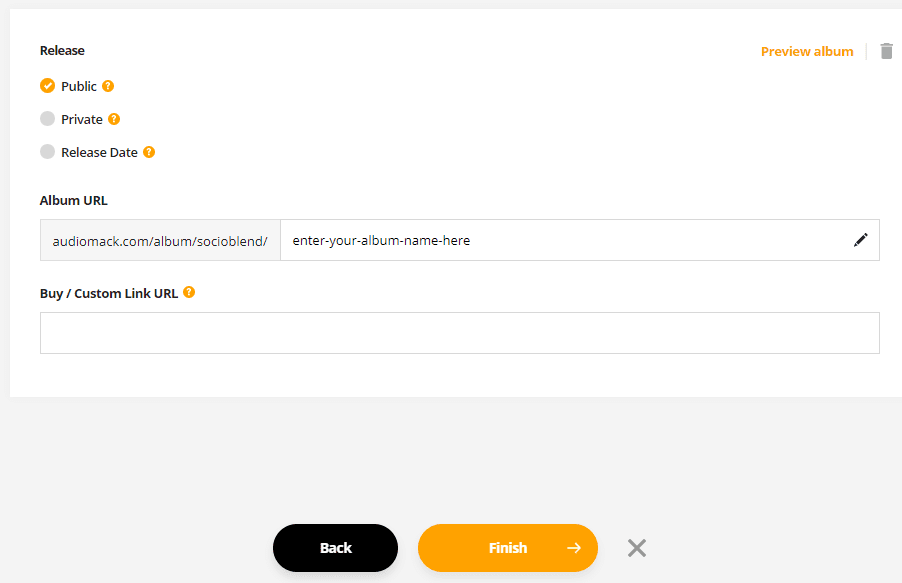
    5. Final step. If you want to publish it at the same moment, you can click on ‘Finish‘ or select ‘Release date’ and schedule it for future release date. (Check the screenshot below)

    Finish
    your music upload is successful on Audiomack

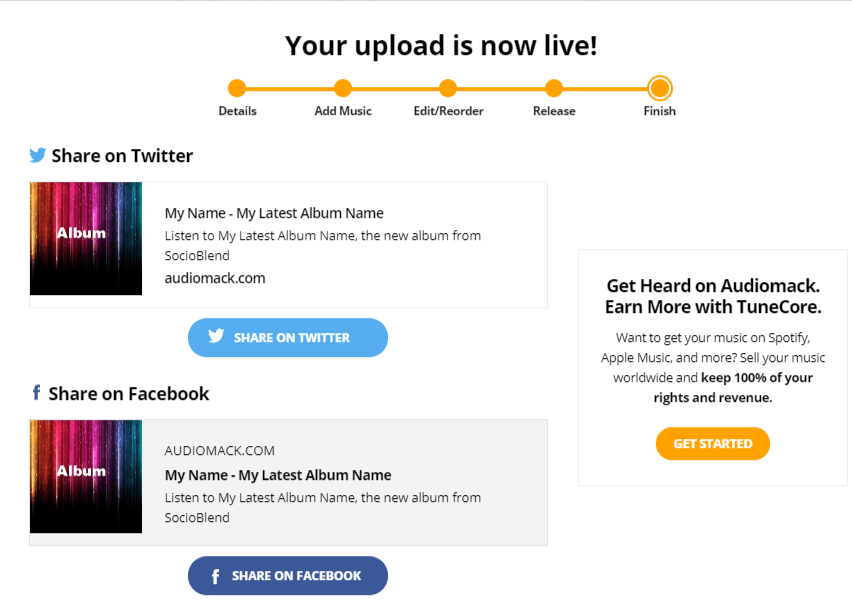
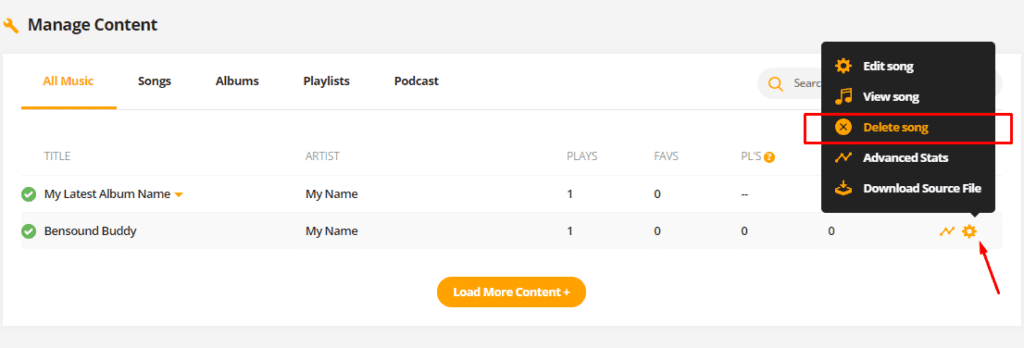
    Your music is successfully upload on Audiomack. But what if you want to delete a track mistakenly uploaded on your Audiomack? Follow the below steps to delete a song from Audiomack.

    How to delete a song/track from Audiomack

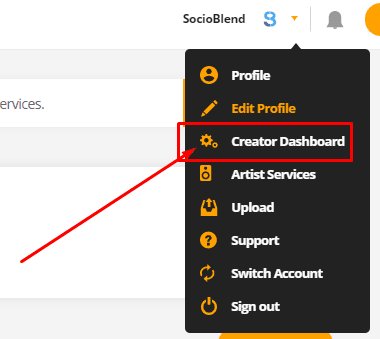
    1. From your profile select ‘Creator Dashboard‘ as shown in the image below.
    Creator Dashboard (Audiomack)
    Creator Dashboard

    2. From the left, select ‘Manage Content‘ as shown in the screenshot below.

    manage content option in audiomack

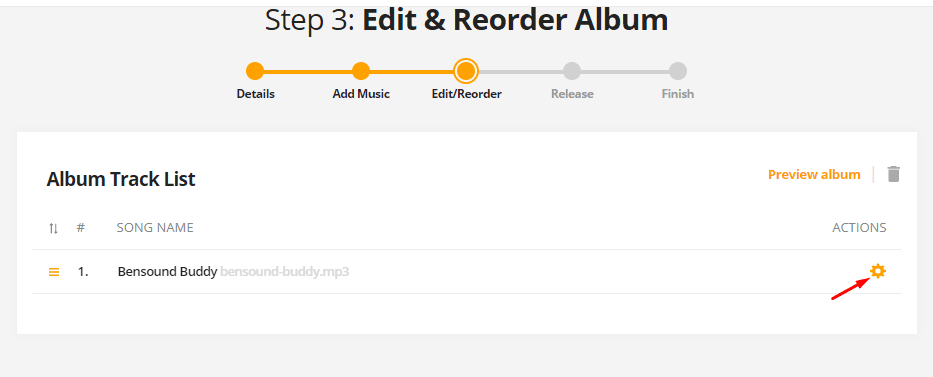
    3. Delete the song. Click on the ‘settings‘ icon of the song which you want to delete.

    delete song on audiomack
    Quick Access
    • Buy Spotify Followers
    • Buy Youtube Views
    • Buy Mixcloud Plays
    • Buy Reddit Upvotes
    • Buy Quora Upvotes
    • Buy Facebook Likes
    • Buy Twitch Viewers
    • Buy Soundcloud Plays
    audiomack audiomack music upload upload music upload music audiomack
    Mohit Maheshwari
    • Website
    • Facebook
    • Twitter

    SEO Analyst and a part-time Content Writer.

    Related Posts

    8 Ways You Can Promote Your Photography Blog

    November 1, 2023

    Igniting Influence: How to Build Authentic Connections with Influencers and Consumers in 2023 

    September 26, 2023

    Unlock the Power of Instagram Reels Ads for New Customers

    September 10, 2023

    Is Threads a Failure? 5 Reasons Why It May Not Work

    September 8, 2023
    Recent Posts
    • 10 Key Tips to Improve Your Search Engine Rankings November 29, 2023
    • 7 Foolproof Tips To Make And Edit Your Videos Perfectly November 29, 2023
    • Lear How Multilingual AI Talking Avatars Can Break Language Barriers November 22, 2023
    • Optimizing Your Website’s SEO with ChatGPT: A Simple Guide November 9, 2023
    • Cloud-Based Tax Software: Benefits For Businesses November 6, 2023
    • Optimizing Conversion Rate for Your Start-Up with Digital Marketing November 6, 2023
    • Top 10 Budget-Friendly Hosting Solutions Tailored for Indian Entrepreneurs November 4, 2023
    The SocioBlend Blog
    Facebook Twitter Instagram Pinterest Vimeo YouTube
    © 2023 SocioBlend. Developed by Jitendra Kumar Singh.

    Type above and press Enter to search. Press Esc to cancel.