


Story-based video production can be stymied even before the camera starts rolling when it comes to character creation. Traditional casting involves finding, booking, coordinating, and managing appropriate actors. AI workflows can mitigate these production challenges early on with the use of prompts and character direction. Pippit combines roles, scenes, images, video, text, and audio in a single creative environment. It uses a canvas method to organize fictional characters prior to the emergence of full scenes. This process is ideal for short dramas, marketing videos, social storytelling, and cinematic projects. The character direction is also clear, providing more visual guidance to later generations.
Understand What Character Direction Means in an AI Video Workflow
Character direction is the process of creating a character that isn’t just a person image. A good role description creates visible features that enable the creation of scenes later on. Some of these characteristics are age, dress, hairstyle, expression, posture, personality characteristics, and visual style. Generated references should communicate a familiar role more clearly with the help of specific details. Stable character directions can reinforce visual plans from the outset for an AI movie. A defined role also provides a basis for subsequent scenes and interactions. The emphasis of prompt writing should therefore be given to certain concrete information that the viewers can see. Don’t say a confident person; describe posture, clothes, expression, and setting. This will provide the visual system with more information to develop characters.
Build Story Roles Through Detailed Character Prompts
Pippit enables creators to add a Role asset via a detailed character prompt. The prompt may include details about the appearance, dress, facial features, expression, pose, lighting, and camera style. The character’s visual identity can be further defined by mood and artistic direction. A film character may require a particular point of view or lighting. A commercial role might need a more polished presentation and styling with a product focus. Ambiguous descriptions can lead to more general results, which are less controllable. Detailed prompts, however, create firmer visual parameters for the intended character. The resulting role image can then be reused across different scenes. This allows character creation to be integrated into story planning and not just a task of making an image.
Create Character References Before Developing Individual Scenes
A role image generated as part of the process can be used as a visual reminder for future story assets. The story studio workflow puts that reference in a wider creative canvas. This setup allows creators to structure characters prior to creating separate scenes. Visual cues (wardrobe, appearance, styling, personality) can be consistent and repeatable to inform visual choices later. Character references also minimize any unnecessary experimentation when scenes are developed later. Once the role is established, location, action, and camera planning are more deliberate. Creators can then create scenes based on a pre-established visual identity. This is particularly effective if the character is used in several episodes. Checking the reference prior to scene generation can also show up missing or unclear character information.
Steps to Direct Your Video Characters Without Casting via Story Studio
Pippit offers a structured workflow that enables the creation of scripts, roles, scenes, and supporting media. The canvas can also host marketing concepts which can then be used in an ad maker workflow. These are the steps for setting up the project from story to episode export.
Step 1: Set up your character direction
- Sign up for Pippit using your Google, TikTok, or Facebook account information.
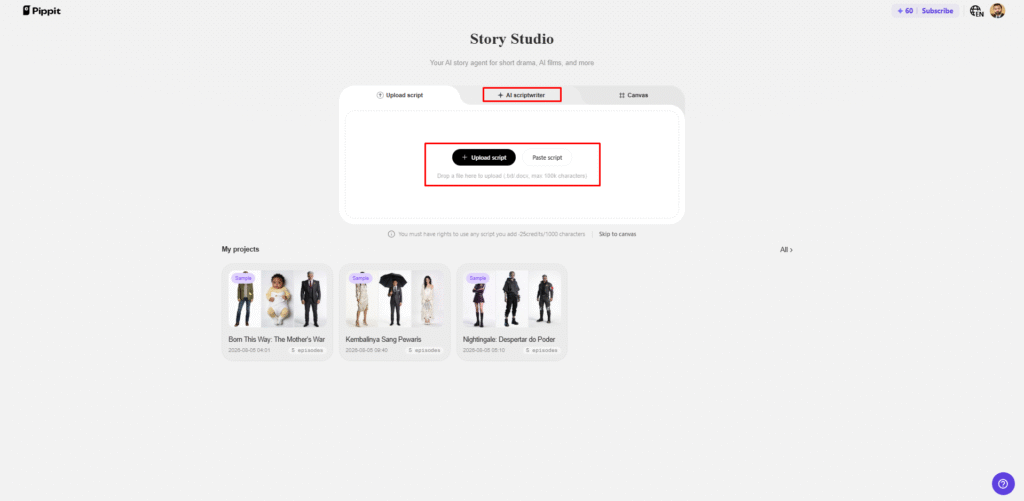
- Open the “Story Studio” tab from the left vertical menu on the home page.
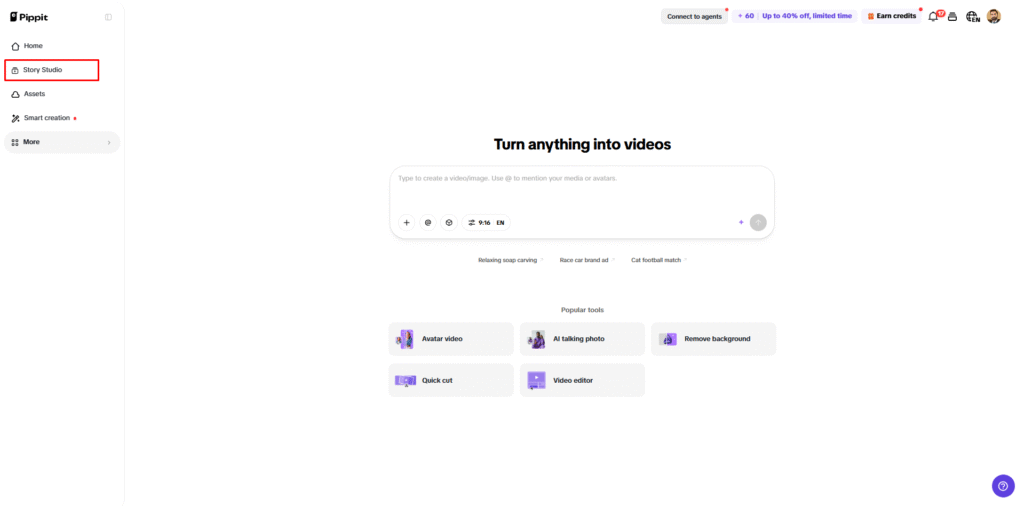
- Add your script by selecting “Upload script”, or enter it manually through “Paste script”.
- You can also use the “AI scriptwriter” from the top menu to create a script about any topic.
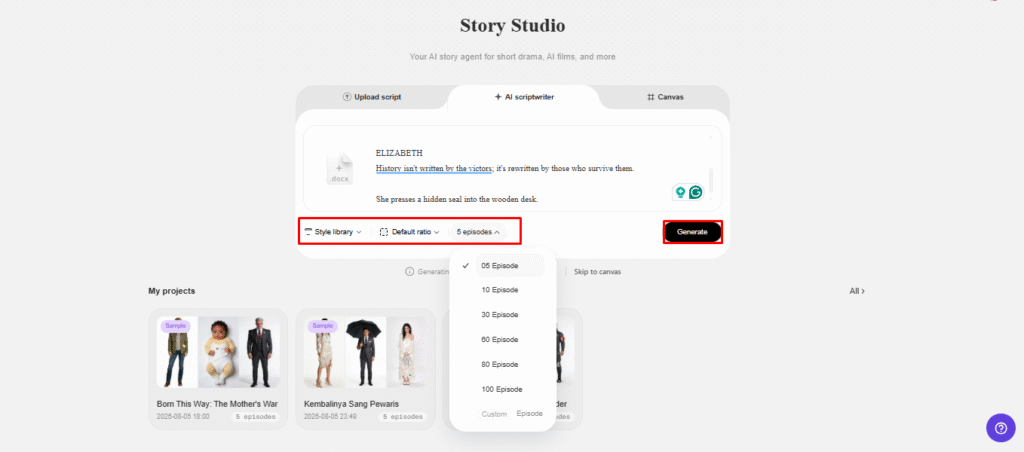
- Choose a story style from the “Style library” option at the bottom left of the dialogue box.
- Click “Default ratio” to choose a custom aspect ratio. Then use “Episodes” to select the number of episodes you want to create.
- Click “Generate” to let AI generate your script and prepare the story structure.
Step 2: Build and direct your characters
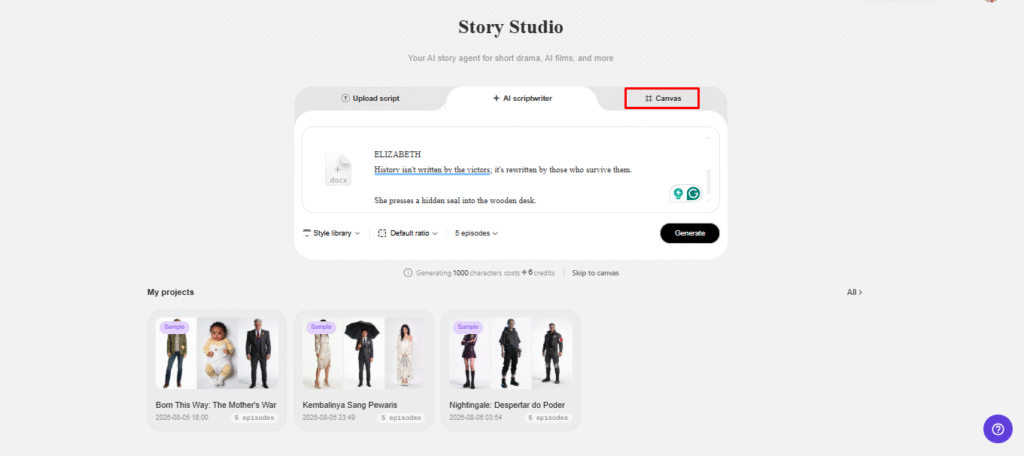
- Open the “Canvas” tab to add images, scene videos, and audio. You can also define characters and assign roles for greater control over your story video.
- Write prompts for each part of the story. Include details such as character appearance, setting, lighting, camera angle, visual style, voice tone, story mood, and product context.
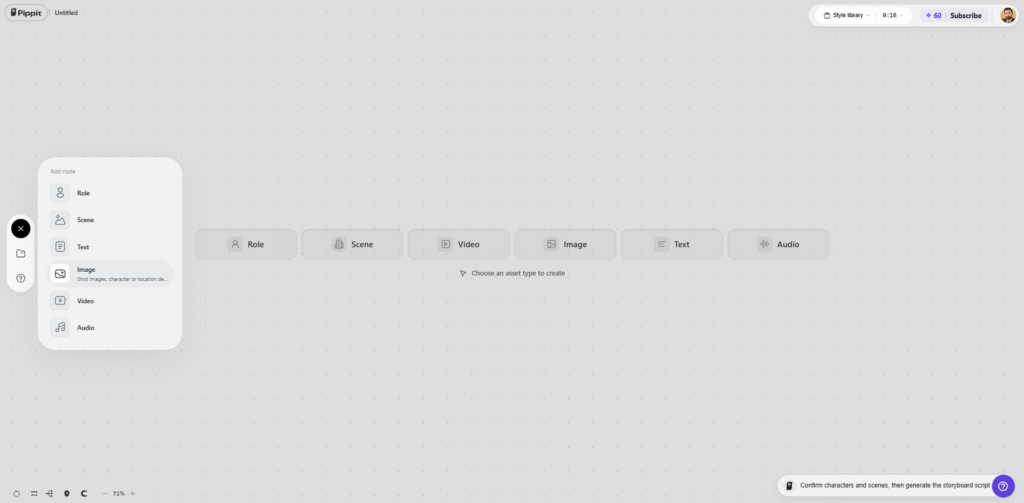
- Assign the required roles and generate your characters and scenes. Then click “Batch generate” to create multiple episodes at once.
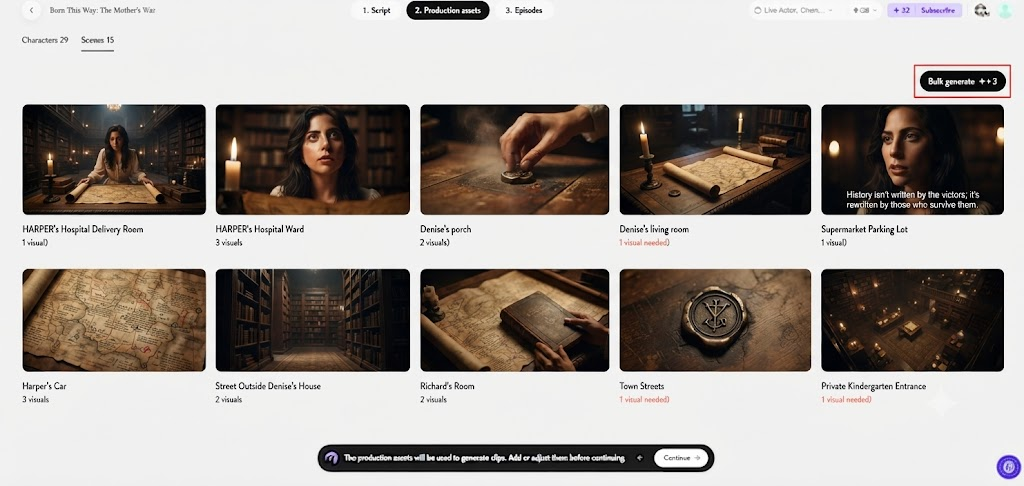
Step 3: Review your directed characters and episodes
- Review the generated episodes and refine the characters, roles, scenes, audio, and other elements as needed.
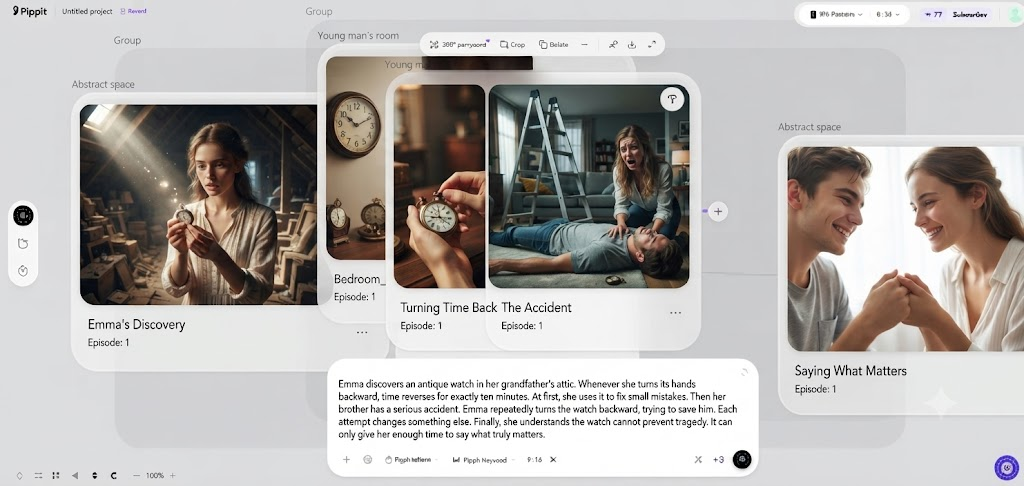
- Once everything looks right, click “Select all” and then “Download” to bulk download the generated episodes to your device.
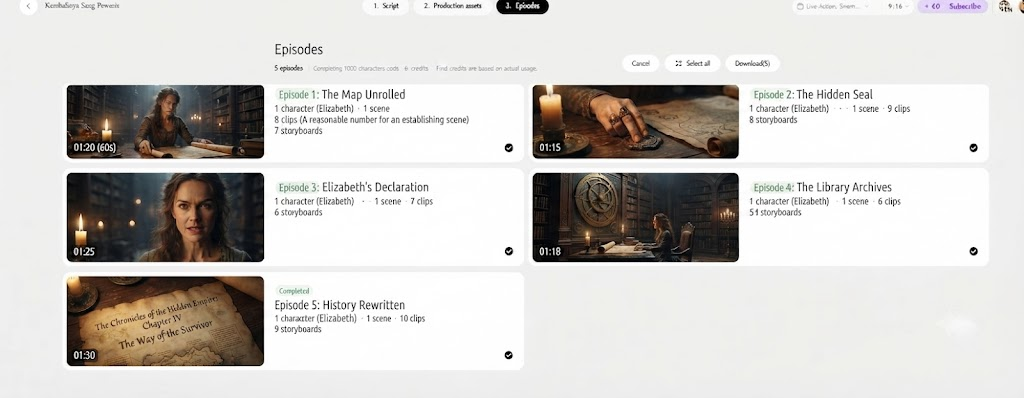
Direct Character Behavior Through Scene-Specific Prompting
You can’t tell what a character will do in every scene based on their identity. Action, pose, facial expression, emotion, and interaction details for each scene. A character may be calm at one moment, and concerned in another scene. Those differences in behavior should be made clear to the audience by visual instructions that are observable in the scene prompts. The direction of the camera can also emphasize the role of the character in the composition. A close-up can highlight emotion, and a wide shot can highlight interaction. Details can alter the presentation without compromising the character identity. Demonstrations of products may involve gestures towards objects and/or intentional movement. Expressive face and listening to body language may be necessary for dialogue moments. More dramatic poses, lighting and camera movement can be used to heighten tension in dramatic sequences.
Maintain Character Continuity Across Different Story Moments
Character continuity is achieved through repetition of important identity information in the relevant scene prompts. Fashion, figure, size, haircut, and identifiable characteristics must be carefully managed. A role reference is a point of reference in the story that gives a visual anchor for later story assets. Generated scenes can still lead to differences, though, and they need to be reviewed. Review facial expressions, costumes, hair and makeup, and ratios before further episodes are created. One way to avoid that is to correct it early, so that one thing doesn’t get carried over to subsequent scenes. Using Canvas organization can help you find and compare related character assets. It also helps to have references close to the scenes to which they refer, as this aids visual checking. Continuity is particularly critical if characters are recurring throughout successive story moments.
Use Character Direction for Different Video Formats
Character-led workflows can be used for many types of narratives as roles can be used as a reusable visual foundation. Then, pacing, settings, and behavioral direction can vary from format to format.
- Short dramas: develop repeat characters with familiar personalities and emotional development.
- AI films: Create character references for the film before creating locations and sequences.
- Marketing videos: Make the spokesperson role appropriate for the visual setting of a product.
- Social videos: Create identifiable characters in frequent short story ideas.
- Product stories: Integrate characters with specific actions, products, and environments.
- Branded narratives: Align character styling with overall visual strategy for campaigns.
Review, Refine, and Prepare Character-Led Video Drafts
Checking characters created can help ensure consistency with the original job description. Examine facial features, attire, expression, posture, lighting, and style before moving on. If any asset is getting off track, add more specific direction to the prompt. It is easier to make character changes before other scenes rely on the changed character. Reviewing the episode might also uncover continuity issues throughout the various story moments. Pippit’s neat canvas keeps roles and related media all in one workspace. This structure allows for quicker comparisons with the reference and generated scenes. It can also be used to locate assets that need to be adjusted prior to final preparation of the episode. A carefully choreographed review process enhances coherence without actual casting coordination.
Conclusion
Prompt-led roles can minimize most of the friction of initial character casting. Establishing the visual identity first provides better foundations for subsequent scene generation. Character references can be used to inform clothing, appearance, behavior, mood, and visual consistency. Then, Canvas organization associates roles with scenes, images, videos, text, and audio. Individual moments require behavioral direction, which is provided by scene-specific prompts. Another place to fix inconsistencies before final export is at episode review. Pippit simplifies this organized process in a single creative environment. This leaves a repeatable process for video production and story creation through character.
