Are you looking for an easy way to become the next big Twitch streamer? Well, you’re in luck. In this blog post, I’ll take you through the simple steps of how to stream on Twitch and get your streaming career off the ground. So if you’re ready to join the ranks of Twitch’s most popular streamers, let’s get started!
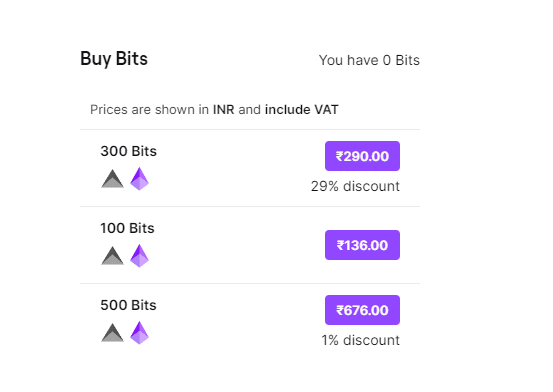
Twitch has several unique features that make it stand out compared to other streaming platforms such as YouTube or Facebook. Many streamers on Twitch are able to monetize their streams using a virtual currency called “Bits“. Additionally, Twitch is well known for routing viewership through its own infrastructure rather than relying on third-party partners like YouTube. This allows streamers to have more direct control over their streams including access to more detailed analytics and data-related metrics than those offered by some of their competitors. Finally, Twitch offers unique features like chat moderation bots that allow viewers and moderators alike more granular control over chatroom interactions.

Related: How to Make Money on Twitch: A Simple Guide for 2023Benefits of Streaming on Twitch
Streaming on Twitch can provide a variety of benefits to both the streamer and their viewers.
For streamers, it’s a great way to connect with like-minded individuals from around the world. Twitch allows streamers to build relationships and communities based on shared interests in gaming, music, and other hobbies.
On a more technical level, streaming on Twitch also provides the opportunity for monetary rewards through various means such as donations, paid subscriptions, sponsorships, and partnerships.
Twitch viewers are also able to benefit from watching streams by gaining access to exclusive content, tips on how to improve in video games or whatever topic you choose to focus on, and interacting with like-minded people in the chat.
Though most of these may not have an obvious or tangible return of investment directly related, they will still contribute towards creating a positive viewing experience for audiences which is invaluable for all involved.
Related: What Is Twitch? Should a Non-gamer Be on This Platform?Setting Up Your Twitch Account
The first step to starting your Twitch career is setting up a streamer account. Creating an account is free, however, it’s encouraged to subscribe to the Twitch Prime subscription which boasts some added benefits such as free goodies or specials in addition to a monthly channel subscription service. To start the process, visit the official Twitch website and set up a new user profile. At this stage, you will create a username and password, and provide company legal content and any other applicable information. Once your profile has been reviewed and accepted you are now ready to start streaming on Twitch. Be sure to configure your settings too; such as your profile image, online status, the language of choice, and more. These changes can help customize your broadcasting experience for your specific audience’s needs.
See also: YouTube Streaming Vs Twitch Streaming: Which is better and why?
Choosing the Right Streaming Software
Streaming on Twitch is a great way to share your gaming experience and connect with other gamers around the world. Before you can start streaming, you need to choose the right streaming software. Your choice will depend on your platform, budget, and technical skills.
1. PC
The most popular streaming software for PC gamers is OBS Studio (Open Broadcaster Software). It can be used with most common broadcasting platforms and gaming platforms, it’s free to use, and has a built-in editor feature. You can also opt for professional paid applications such as Xsplit or vMix if you are looking for advanced features such as overlays, multiple scenes, and chroma keying.
2. Mac
If you’re using a Mac, there are some excellent free options like QuickTime Player or Open Broadcast Studio (OBS), but paid alternatives such as Wirecast are available too. Wirecast offers more advanced features including support for multiple cams and graphic overlays, making it easy to add a professional touch to your broadcasts.
3. Console
For console gamers, many recommend the Elgato Game Capture HD60S+ which is an all-in-one capture device that connects directly to your game console for high-definition streaming at 60 frames per second (FPS). This will give not only high-quality broadcasts but also allow audio playback from other devices in real-time, making it much easier to do live commentary while playing.
Related: 10 Ways to Immediately Increase Your Twitch FollowersConnecting Your Streaming Software to Twitch
After signing up for Twitch and setting up all the hardware, the next step is connecting your streaming software to Twitch. This will most likely require downloading a plug-in program such as OBS Studio and streaming software like Streamlabs. The connection will enable you to stream directly from the chosen program to Twitch, allowing viewers to watch your broadcast.
The exact setup process will vary depending on what type of software and plugins you’re using so make sure to check the individual programs’ documentation for specific instructions. Generally, though, most streaming applications feature a “Broadcast Settings” section where you can enter your stream key (found on your Twitch dashboard) to connect directly to the platform.
Once everything is entered correctly and saved, you should be able to start broadcasting immediately — simply click “Start Streaming” and enjoy!
Configuring Your Stream Settings
Once you have signed up for a Twitch account and installed the necessary streaming programs, the next step is to configure your stream settings. This involves setting your video quality and audio compression and other parameters to get your stream up and running.
For optimal viewing experience, it is important to select high-quality resolution settings. Twitch supports two main streaming resolutions; 1280x720p at 30 frames per second (fps) or 1920×1080p at 60 fps. While it may be tempting to select a higher resolution setting such as 4K, this can lead to buffering issues due to limited bandwidth on the viewer’s end unless they have a premium connection.
In addition, you may also want to adjust your bitrate settings which will dictate how much data is transferred in your stream. To avoid lag issues, lower bitrates provide better performance especially if you’re using a slower internet connection. On the other hand, if you have faster speeds you can use higher bitrates which will give clearer streams with less pixelation.
Finally, configure the audio compression of your stream as well as video capture properties such as overlay options and webcam or microphone use for live interaction with audience members. Once all of these adjustments are complete you should be ready for streaming success.
Related: Buy Twitch Live-Stream ViewersBroadcasting Your Stream
First, to broadcast your stream on Twitch, you will need to create a profile and download and install broadcasting software. You can download streaming software such as OBS Studio, Xsplit Broadcaster, or Streamlabs OBS from the internet. After launching your preferred streaming software, you will need to configure it according to your needs.
Once your streaming software is configured correctly, you can start broadcasting your stream on Twitch. First, navigate to your Dashboard page on Twitch and open it with the “Go Live” option from the navigation bar at the top of the webpage. Doing so will prompt a new window where you can select the game that you are going to play as well as whether or not you want viewers to be able to follow or chat through their phones with an Amazon account.
After selecting both these settings, click “Go Live” and start broadcasting your stream on Twitch. Your viewers will be able to watch in real-time and see what’s happening in the game while they comment and interact with each other in chat; make sure they follow all of Twitch’s rules too. Once completed, click “Stop Streaming” when you are finished and the broadcast successfully ends.
Growing Your Twitch Community
Growing a Twitch community takes time and dedication, but with the right tactics and attitude, you can start to build a following that is engaged and dedicated.
The first step is to brand your channel. Make sure you have a unique display name, an appropriate avatar, and an eye-catching profile banner. You should also create original content to promote your stream, including videos or creative designs for followers to share. This will help bring new people in and put you at the top of their minds when they’re looking for something new to watch.
Your profile should include information about yourself so your viewers can better connect with you on a personal level — people want to connect with a person rather than just a stream. Additionally, adding information about what type of content you specialize in will ensure those who are interested in that kind of content find their way over to your channel.
Related: YouTube Streaming Vs Twitch Streaming: Which is better and why
You should also create different ways for your viewers to get in touch with you like through social media links or email. Not every viewer will use Twitch chat while they watch streams so offering other avenues of communication can be beneficial as well as posting highlights or clips from past streams which allows new viewers an easy way to catch up with what they missed before diving back into live streaming sessions.
Using social media accounts such as Twitter or Facebook is another great way to grow your Twitch community. Once people see what type of streamer or content creator you are on those platforms they’ll become more aware of your own stream page too! Try using high-quality images, funny clips, streaming tips/tricks advice, anything related to the type of gaming experience that represents who you are as a gamer. Don’t forget about streaming from platforms like YouTube too. These platforms provide another avenue for viewership which makes it easier for more people than ever before will discover what Twitch could offer them in terms of entertainment value.

